

Findings Overview
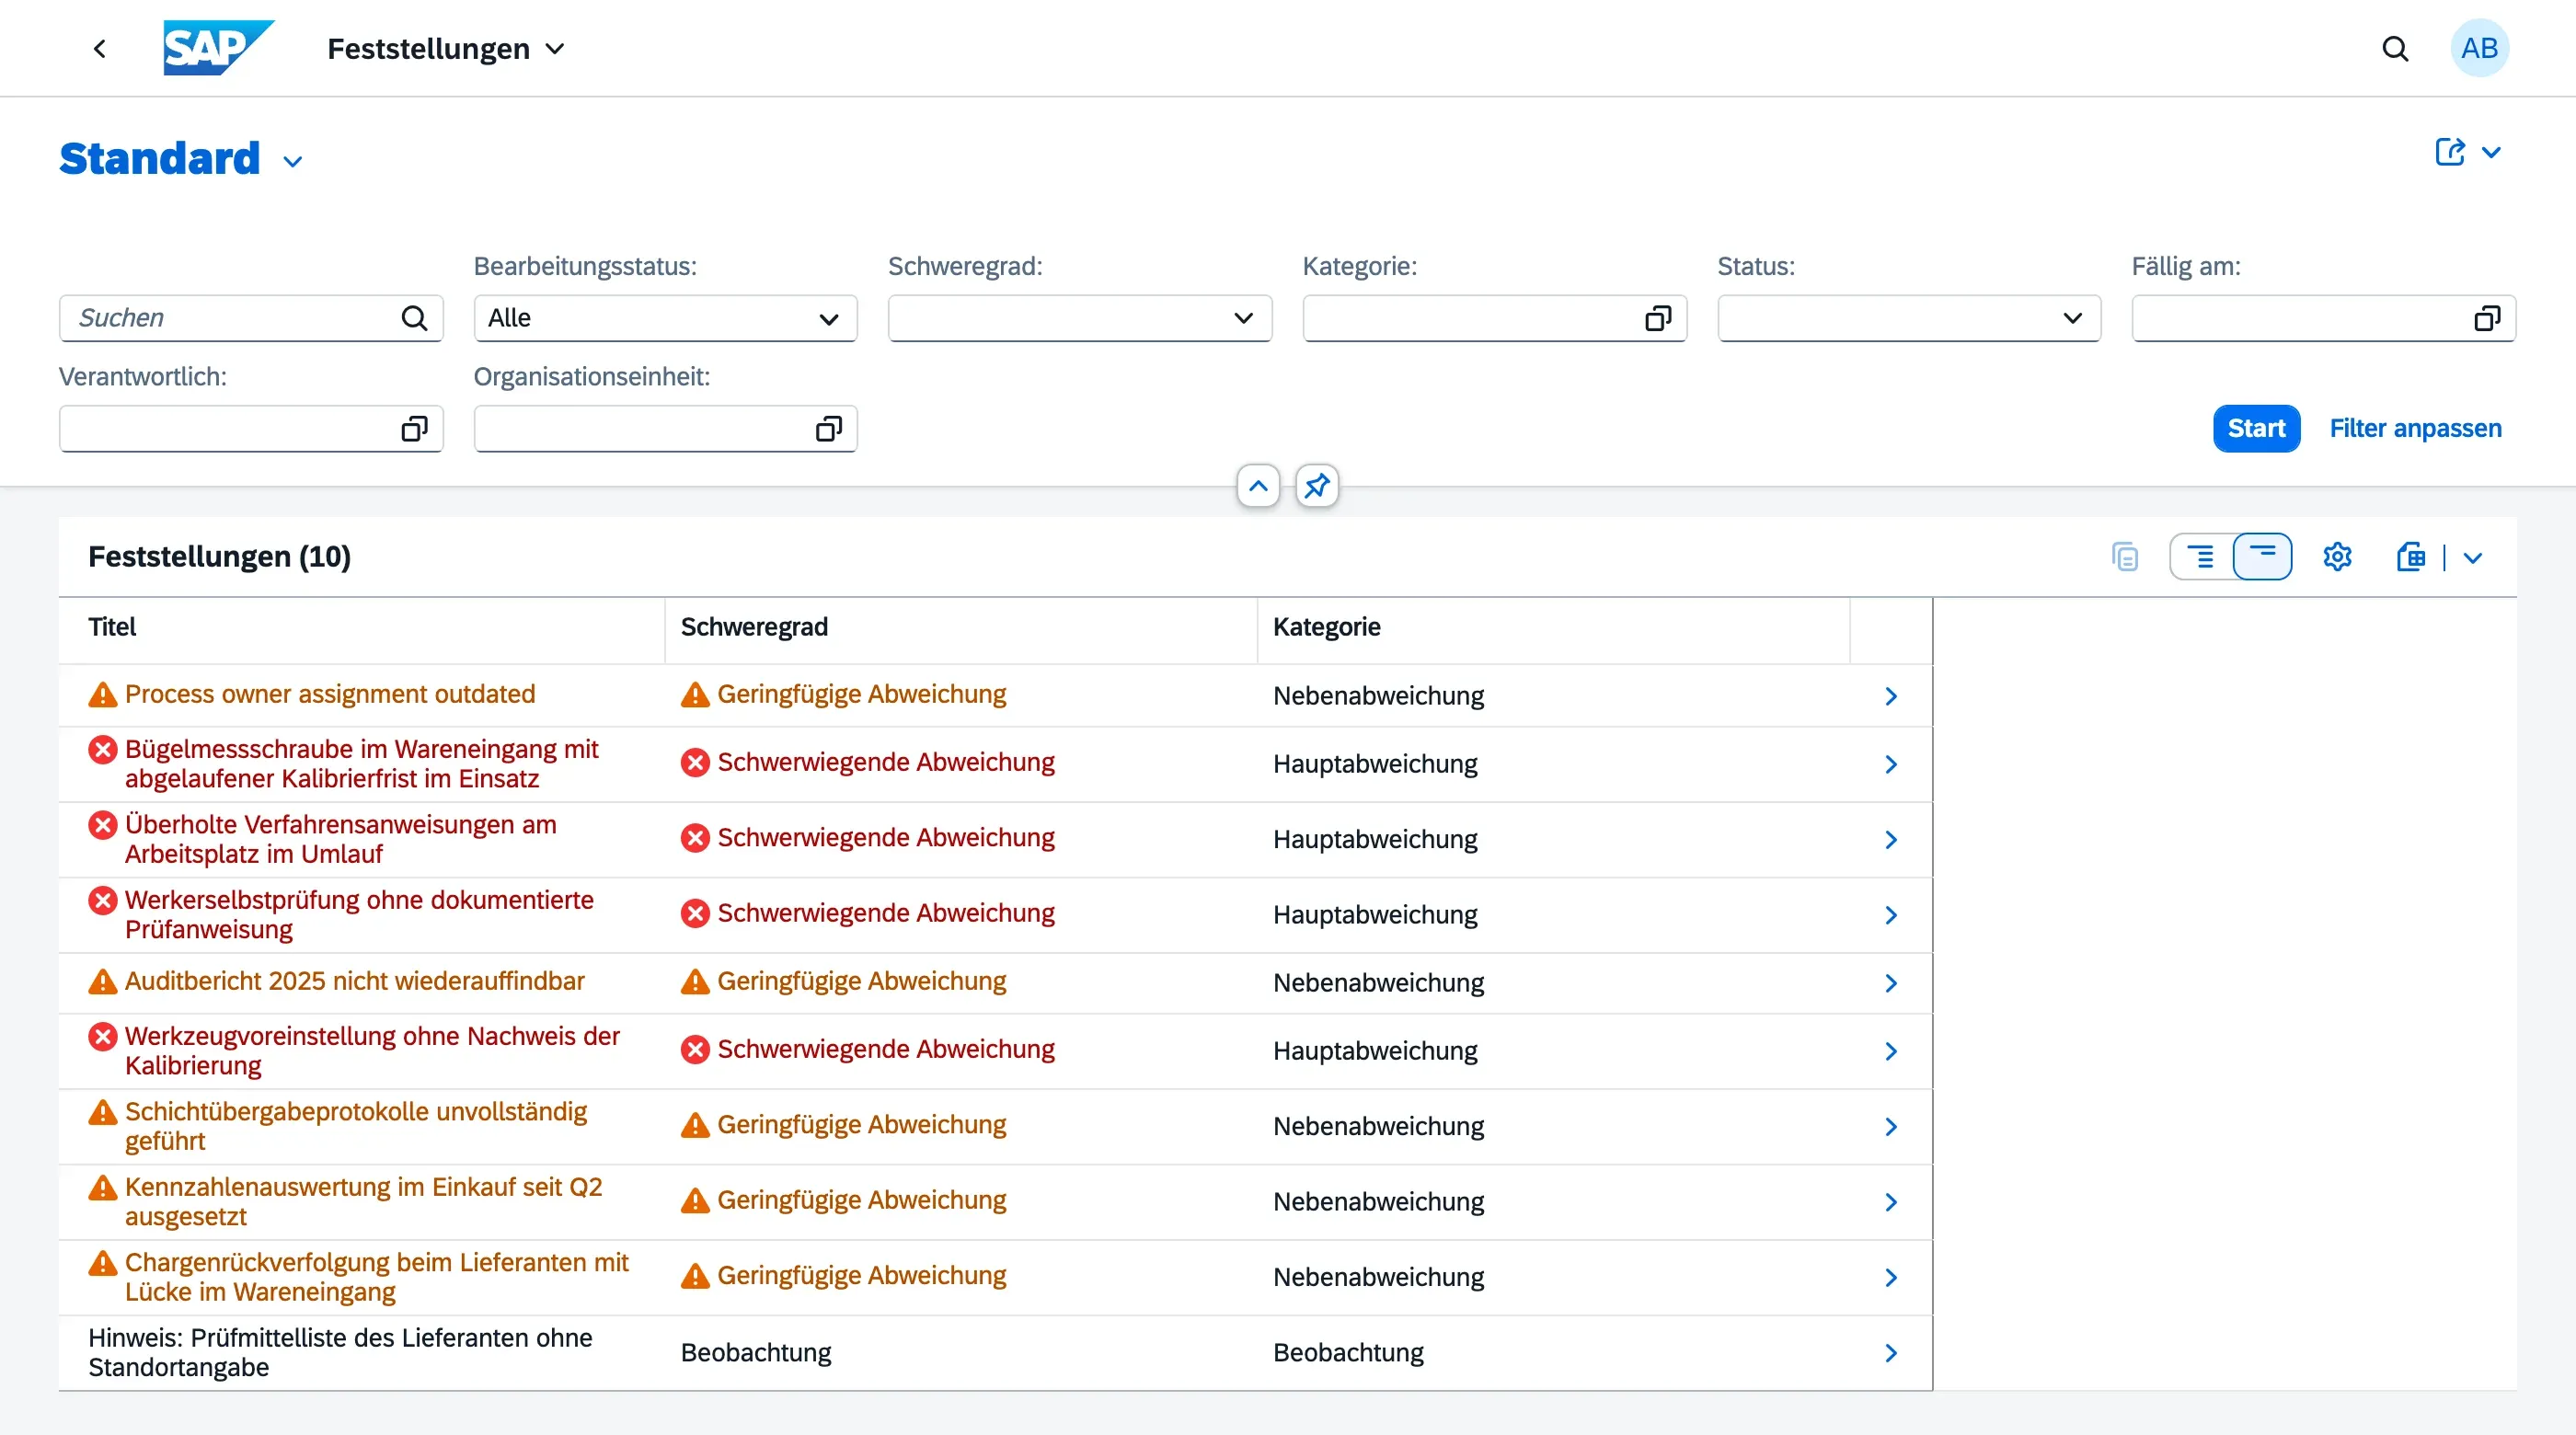
The Findings Overview app gives Audit Managers and Auditors a single place to monitor all findings across all audits — without having to open each audit individually. Auditees can also use it to review the findings raised against their own org unit, once those findings have been published.
Who can use this
Section titled “Who can use this”- Audit Managers — full access; edit status, responsible person, and due date on any finding
- Auditors — full access; same editing capabilities
- Auditees — read-only access to findings from audits against their own org unit, once the audit has reached Findings Published. Findings from audits still in progress, or against a different org unit, are not shown. Auditees cannot edit findings, change their status, or add action items from here — but they can acknowledge a finding and add comments (see below).
What the Findings Overview shows
Section titled “What the Findings Overview shows”Each row in the list represents one finding. The key columns are:
| Column | Description |
|---|---|
| Title | Finding title; colour-coded by severity (red = Major NC, orange = Minor NC) |
| Severity | ISO severity classification |
| Category | Finding category (e.g. Process, Documentation) |
| Status | Current finding status |
| Responsible Person | Person accountable for addressing the finding |
| Due Date | Resolution deadline; red if overdue and finding is not yet closed |
| Audit No. | The audit this finding belongs to |
| Audit | Audit title |
| Org Unit | Org unit of the parent audit |
Filtering findings
Section titled “Filtering findings”Use the filter bar at the top to narrow down what you see:
- Severity — filter by Major NC, Minor NC, or Observation
- Category — filter by finding category
- Status — filter by finding status
- Due Date — filter by a date range
- Responsible Person — find all findings assigned to a specific person
- Org Unit — limit findings to a specific organisational unit
Click Go to apply filters. Click Adapt Filters to show or hide additional filter fields.
Opening a finding
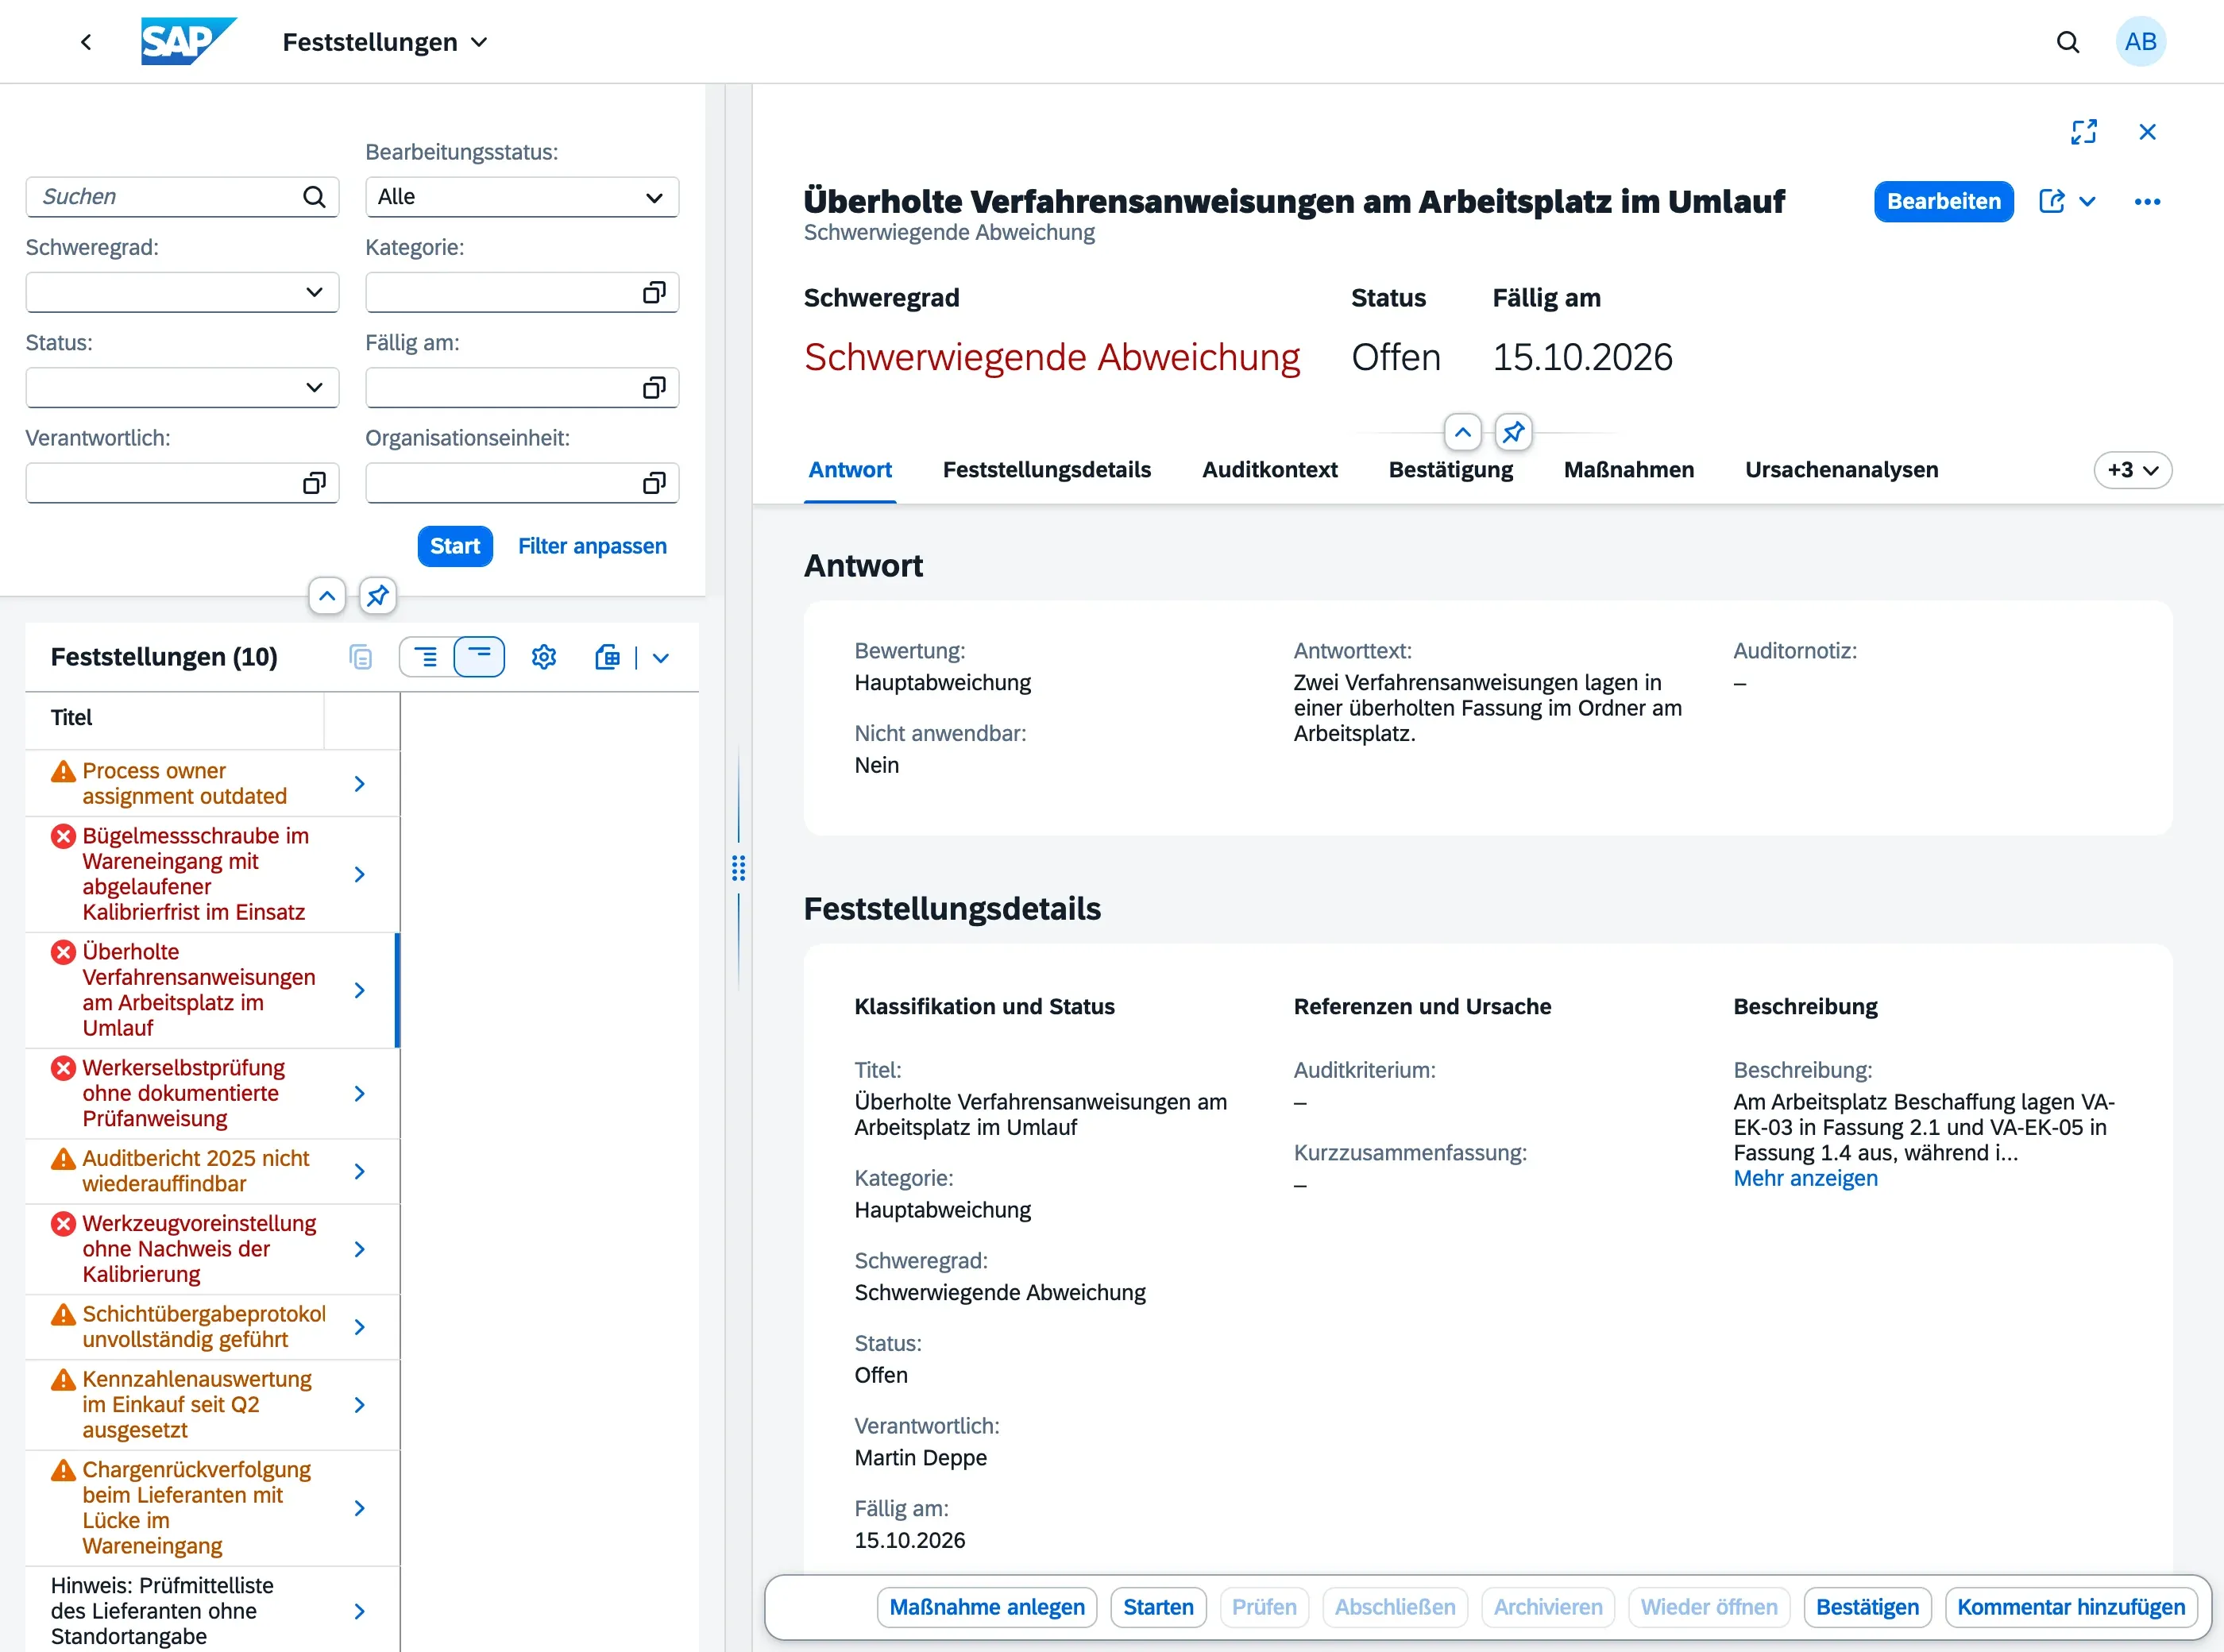
Section titled “Opening a finding”Click on any row to open the finding’s Object Page in a split-screen view. The right panel shows:
- Finding Details — title, category, severity, status, responsible person, due date, audit criteria, root cause, and full description
- Audit Context — read-only section showing the audit number, audit title, org unit, and the question the finding was raised against
- Question Response — read-only section showing the original questionnaire answer the finding is based on: the rating given, whether it was marked not applicable, the response text, and the auditor’s note
- Action Items — list of action items linked to this finding, with a button to add a new one directly (see below)
- Acknowledgement — whether the finding has been acknowledged, by whom, and when (see below)
- Comments — a running conversation between the audit team and the auditee about this specific finding
- Attachments — evidence files attached to the finding
- Change History — full audit trail of all changes to the finding
Editing a finding
Section titled “Editing a finding”Findings can be edited in draft mode:
- Open the finding from the list
- Click Edit in the Object Page toolbar
- Change status, responsible person, due date, or any other field
- Click Save to save as a draft, or Activate to publish the change
Adding an action item from a finding
Section titled “Adding an action item from a finding”You no longer need to switch to the Audits app to raise an action item for a finding:
- Open the finding from the list
- Click Create Action Item in the Object Page footer
- Fill in the title, an optional description, responsible person, priority, and due date
- Confirm to create the action item
The new action item immediately appears in the Action Items list on the finding, and is also visible in the Action Workbench and the responsible person’s My Actions worklist.
Acknowledging a finding
Section titled “Acknowledging a finding”Once a finding has been published (audit status Findings Published or later), the auditee has the opportunity to confirm they’ve had a chance to review it — this is a standard part of the audit process (ISO 19011).
- Open the finding from the list
- Click Acknowledge in the Object Page toolbar
- The finding’s Acknowledgement section now shows that it was acknowledged, by whom, and on what date
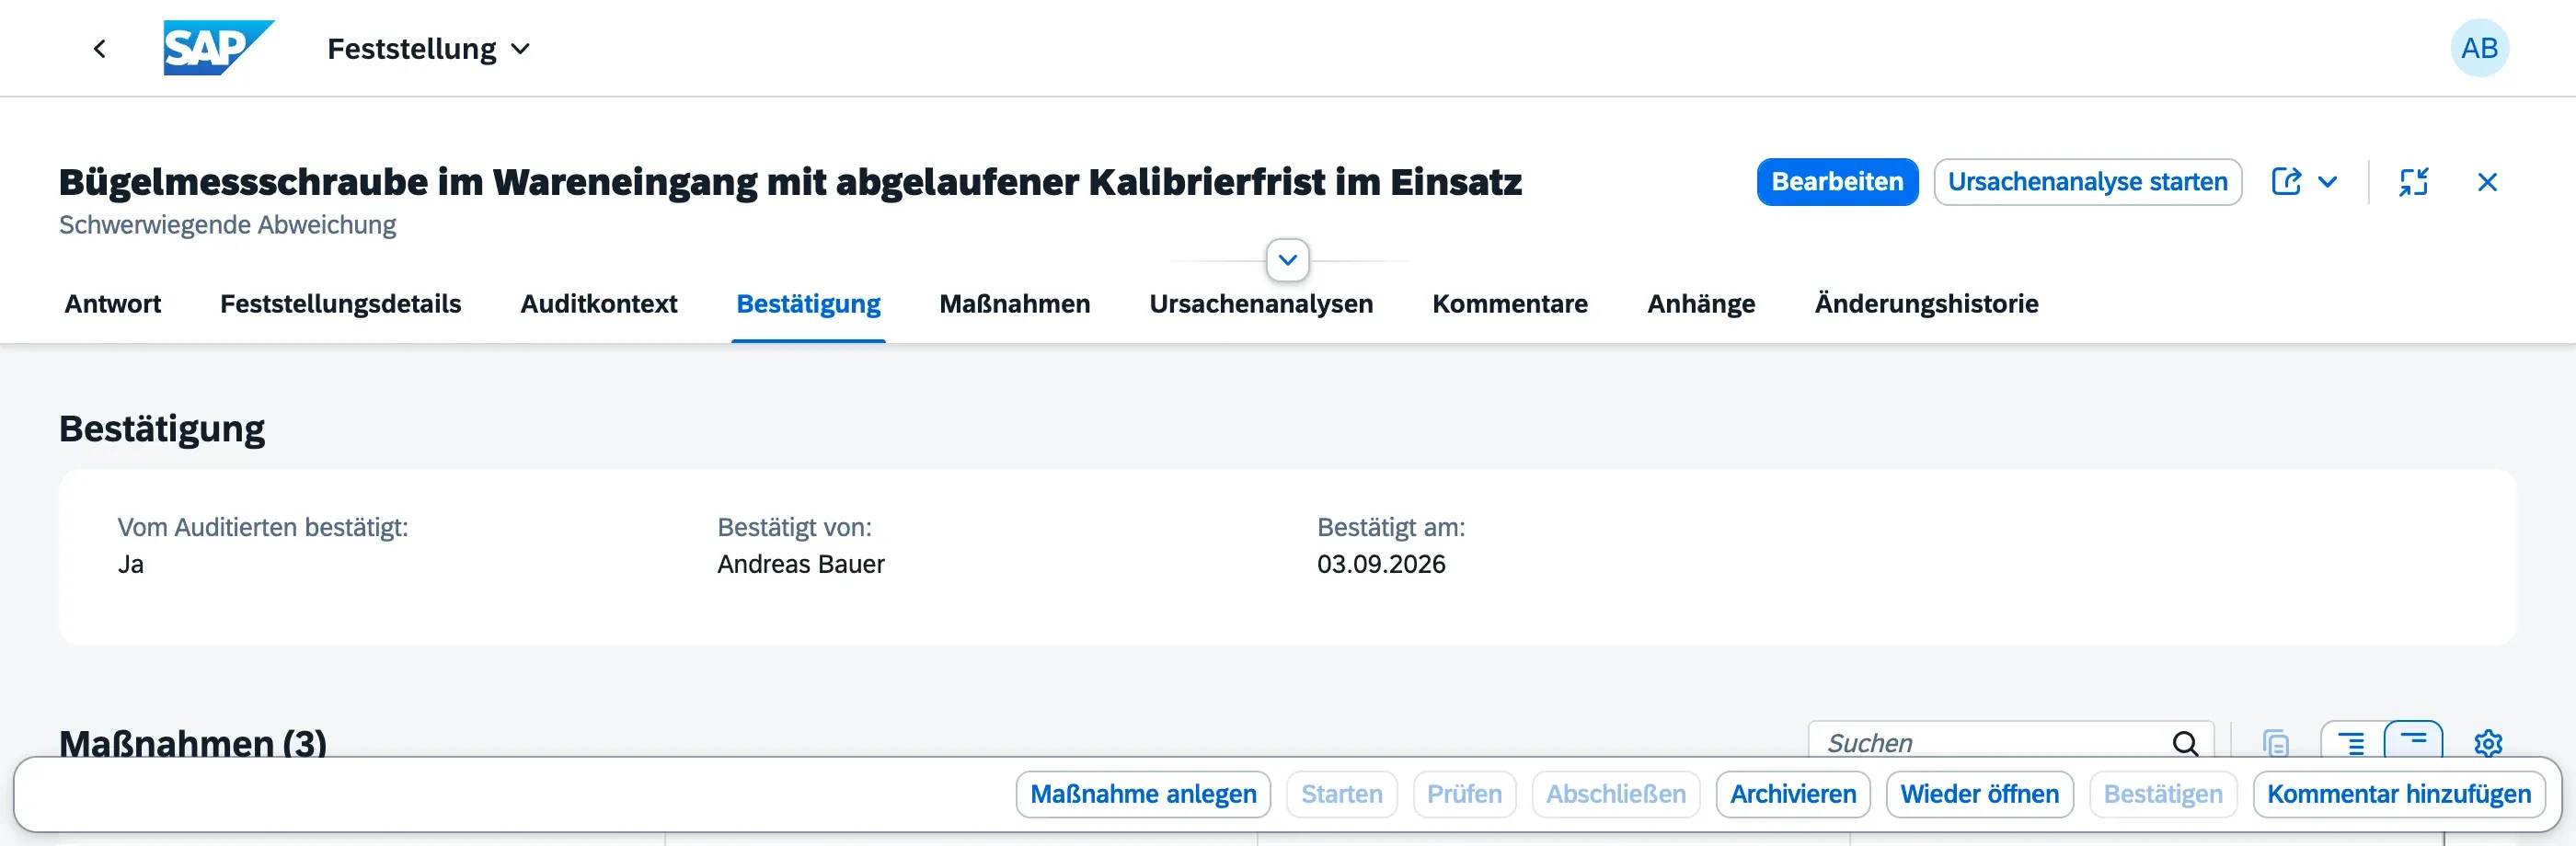
Acknowledging is a one-time confirmation — once done, the Acknowledge (Bestätigen) button disappears and the finding cannot be un-acknowledged. If an auditee has no access to qportal (for example, an external supplier), an Audit Manager or Auditor can record the acknowledgement on their behalf instead, after confirming it was given — for example verbally during the closing meeting.
Commenting on a finding
Section titled “Commenting on a finding”Both the audit team and the auditee can leave comments on an individual finding — useful for clarifying a point, raising an objection to how a finding was classified, or simply confirming receipt without using the formal Acknowledge action.
- Open the finding from the list
- Click Add Comment in the Object Page toolbar
- Enter your comment and confirm
Comments are timestamped and show who wrote them. Once posted, a comment cannot be edited or deleted.
Criticality indicators
Section titled “Criticality indicators”The Findings Overview uses colour coding to make priority immediately visible:
- Red (Error) — Major Nonconformity, or overdue (due date passed and finding is not closed)
- Orange (Warning) — Minor Nonconformity
These indicators update automatically as findings are edited.
Sorting and personalisation
Section titled “Sorting and personalisation”The list is sorted by due date (ascending) by default, so overdue and upcoming findings appear first. Use the column headers to sort differently. Use View Settings (gear icon) to show or hide additional columns.